AWS Database Blog
Sending notifications from Amazon Aurora PostgreSQL
Enterprise customers execute many day-to-day batch jobs on Amazon Aurora PostgreSQL databases, and need notification methods such as email or text after completing such jobs to keep track of their activity. Because Aurora PostgreSQL is a managed service, it restricts access to database extensions such as pgsmtp and pgplpythonu for security reasons. This raises the need for a database to send notifications by other means of automated messaging.
This post uses the scenario in which an organization needs to pull its employees’ information for business verification on a scheduled basis, and requires a notification after the job completes. The post demonstrates how to create a sample job using Python, and uses AWS Lambda and Amazon SNS to deliver notifications via email or text messages.
Prerequisites
This solution requires the following:
- A valid AWS account with access to the appropriate AWS services.
- An Aurora PostgreSQL database. For more information, see Creating an Amazon Aurora DB Cluster.
- A VPC endpoint for SNS, for sending notifications to outside of your VPC. For more information, see Creating an Amazon VPC Endpoint for Amazon SNS.
- Client tools such as pgadmin or PSQL Client tools to connect to the database.
- A database password, which you have already configured and stored in AWS Secret Manager. For more information, see What Is AWS Secrets Manager?
Solution Architecture
The following architecture shows how Amazon RDS, PostgreSQL, Lambda, and SNS integrate to send notifications upon completion of batch jobs. The process is as follows:
- A Lambda function triggers the database batch job.
- The database job inserts the job status as 0 or 1 in the database queuing table.
- A Lambda function fetches the status from the queuing table and pushes the information to the SNS API.
- SNS delivers email or mobile notification to subscribers.
See the following diagram of the architecture:
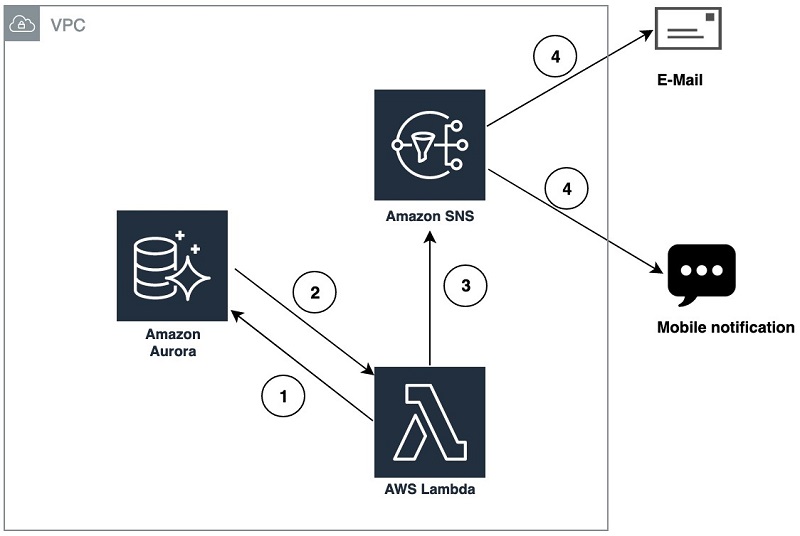
Fig1 : Architecture diagram depicting configuration to send Notification from Aurora PostgreSQL
Configuring the Aurora PostgreSQL database
To configure your database, complete the following steps.
- Log in to the Aurora PostgreSQL database using the following code from Linux Terminal:
- When prompted, enter your password.
For alternate connection methods, see Connecting to an Amazon Aurora PostgreSQL DB Cluster in the RDS User Guide.
- Create a table in the database called
pg_emailtable.
This table stores the information about the jobs you execute and helps track whether the subscribed users received the notifications. See the following code:This post uses the function
pgfunc_ins()as an example batch job, which is scheduled to run for every five minutes. This sample batch job retrieves employee details from the database for a particular employee ID. If the employee ID exists, it inserts a record into the queuing table that the execution status is successful. If not, it inserts a failure status.
- Enter the following code for the
pgfunc_ins()batch job:
Setting up SNS to enable notifications
The following steps show how to create a topic and SNS subscription add the appropriate users to receive notification.
- Log in to your AWS account and navigate to the SNS dashboard.
- From the menu, choose Create topic.
- For Name, enter
sns_pg_lambda. - Optionally, enter a Display name.
The following screenshot shows the Create topic options:
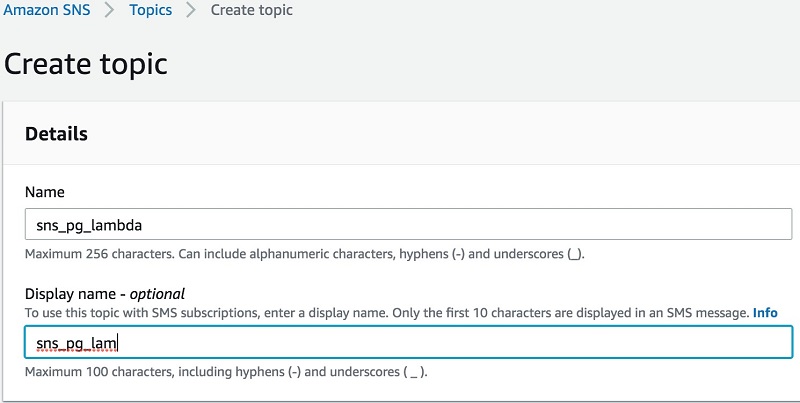
Fig2: Create topic
- From the menu, choose Subscriptions.
- Choose Create subscription.
- For Topic ARN, Choose the topic ARN which you created in Step 4.
- For Protocol, select the type of endpoint.
- For Endpoint, enter the endpoint information, In this scenario we are creating Email and SMS endpoints.
The following screenshot shows the Create subscription details:
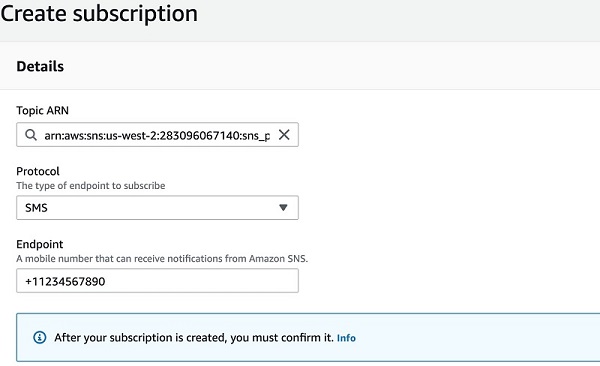
Fig3: Creating SMS Subscription for the Topic ARN
Click Create subscription
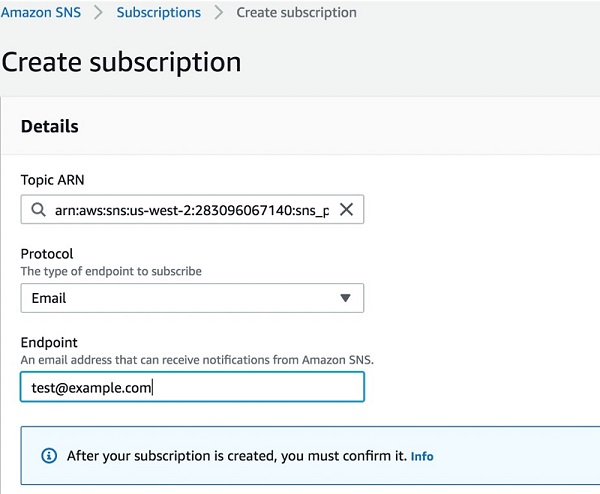
Fig4: Creating Email Subscription for the Topic ARN
Click Create subscription
- Open your subscribed email and confirm subscription by clicking the link you received in the email.
The phone number is confirmed automatically. The status of Email and SMS protocol confirmation can be viewed in subscriptions page as shown in Fig5.
See the following screenshot of the search results for your subscription:
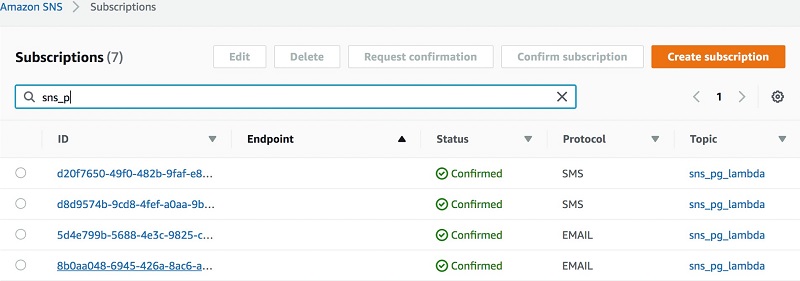
Fig5: SMS and Email Protocol Status
Setting up IAM policies
To configure your IAM policies, complete the following steps.
- On the IAM console, from the menu, choose Policies.
- Choose Create policy.
On this page, you can create a custom policy defined for this specific use case. The following screenshot shows the Create policy page:
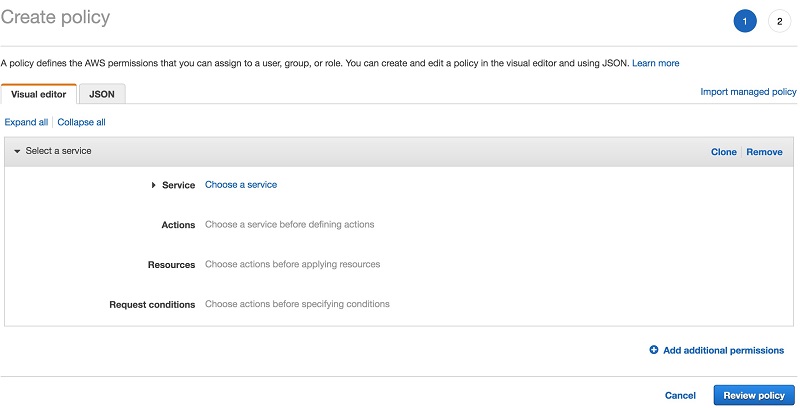
Fig6: Create policy
- From the tabs, choose JSON.
- Enter the following code:
This code establishes the minimum required permissions to create a function and publish a message to the subscribers.
- Choose Review policy.
The following screenshot shows the Review policy page, enter the custom “Name” and “Description” for the policy, In this scenario I’ve used “pgemailpubpolicy” as Policy Name:
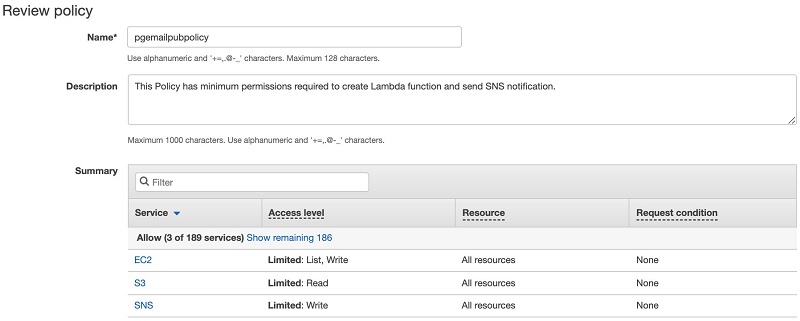
Fig7: Review Policy
- Choose Create policy.
Setting up your Lambda function
You are now ready to create your Lambda function. Complete the following steps.
- Download the Python module
psycopg2, from psycopg2 2.8.3 on the PyPI website.
You need this module to make connections to the PostgreSQL database using Python. The Lambda function helps execute the PostgreSQL database batch job and delivers the notification to the subscribers upon completion using SNS APIs. - Enter the following code and save the file as
apg_email_function.py, making changes based on your environment and requirements: - Zip the file in step 1(psycopg2) ,step 2(apg_email_function.py) and save the zipped file in an accessible location on your computer. For this scenario I’ve named the zip file ‘pgemaildbcode.zip”
- On the Lambda dashboard, choose Create function.
- Choose Author from scratch.
The following screenshot shows the Create function options:
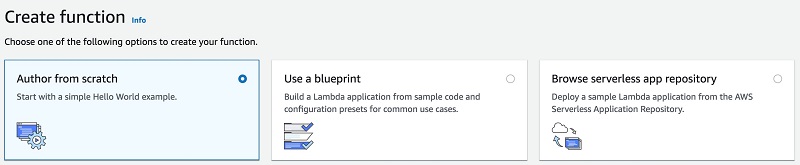
Fig8: Create Lambda Function from Scratch
- For Function name, enter a custom name for your function. This post uses
mypgemailfunc. - For Runtime, select your language. This post uses Python 2.7.
- For Execution role, select Use an existing role.
- For Existing role, enter the role you created previously (for this post,
pgemailpubrole). - Choose Create function.
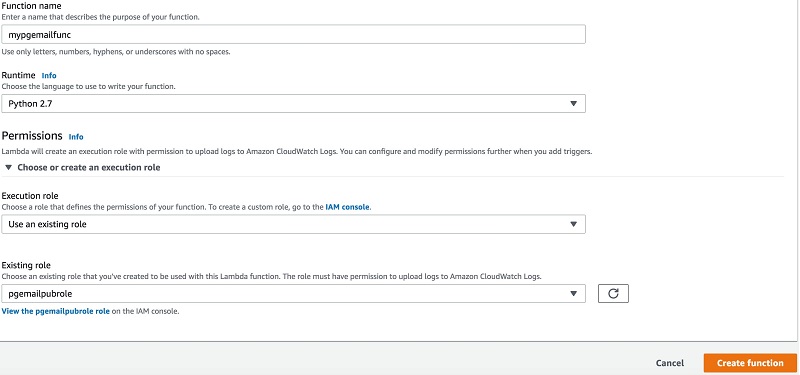
Fig9: Create function variables steps 6-10
- After you create the function successfully, enter details in Function code
- For Code entry type, select Upload a .zip file from Step 3.
- For Runtime, select Python 2.7.
- For Handler, enter
apg_email_function.lambda_handler.
The following screenshot shows the Function code options:

Fig10: upload the code and define Handler
The code provided in step2 has the variables dbname, hostname, username, passwordvalue, topicarn, and username. These should populate the Environment variables fields to pass the values to function code dynamically. See the following screenshot of the Environment variables fields:

Fig11: Enter environment variables defined in python code
- In Execution role, select Use an existing role.
- For Existing role, choose the IAM role you created earlier.
- In Basic settings, for Description, enter
apgemailsettings. - Set Memory to 512 MB.
- For Timeout, enter 0 min and 30 sec.
You can modify the memory and timeout as is suitable for your job.
The following screenshot shows the Execution role and Basic settings options:
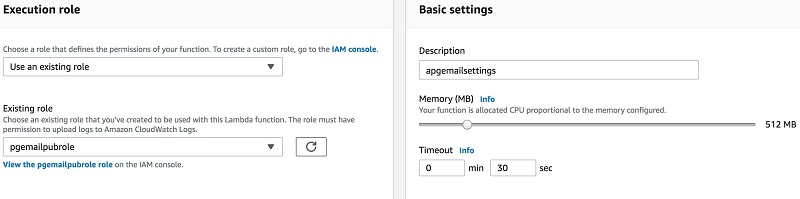
Fig12: Enter Execution role and Basic settings for Lambda function
- Scroll down to Network settings, choose the VPC in which your Aurora PostgreSQL Instance resides.
For more information about retrieving the Aurora PostgreSQL database cluster configuration including VPC, subnets, and security groups from the RDS console, see Viewing an Amazon Aurora DB Cluster.
- Choose Save.
Testing your Lambda function
You can now configure a test event to test your new function.
- In the upper right corner of Lambda console, Choose “Test”
- Select the Create new test event check box.
- For Event template, select the template “Amazon SNS Topic Notification”.
- For Event name, enter
samplesnsevent.
The following screenshot shows the Configure test event page:

Fig13: Configure test event for Lambda function
- Choose Create.
- To test the
mypgemailfuncfunction, choose Test from the upper right corner of Lambda console. - Once Lambda function executes, you will receive an Email and Mobile notification stating “Batch Job 1:employee id 100 found and job executed successfully at 2019-09-19 17:51:37.836658”
The following screenshot shows an example email:

Fig14: Email Confirmation
The following screenshot shows an example text message:
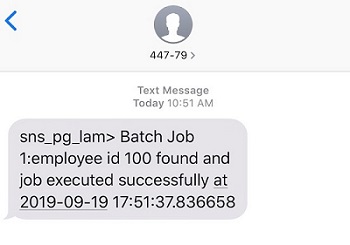
Fig15: Mobile Notification Confirmation
After executing the Lambda function successfully, verify the pg_emailtable table in your database with new records by querying “select * from pg_emailtable”
The script includes a mechanism to clean up the older message delivered previously. However, to have ideal table performance, you should keep Auto Vacuum ON and perform an aggressive vacuuming to make sure table performance doesn’t degrade, along with other database maintenance operations to make sure overall performance is intact. For more information, see VACUUM, Automatic Vacuuming, and Routine Vacuuming in the PostgreSQL documentation.
For this post, the autovacuum runs for every 1000 updates, inserts, and deletions happening on the tables to make sure there is no reduction in performance while performing operations on pg_emailtable. To choose a value for your use case, perform a thorough testing and choose the value suitable for your environment. See the following code:
If the table has heavy usage and serves thousands of emails in an hour or a day, consider performing manual vacuuming using the command vacuum analyze pg_emailtable.
Summary
This post showed an end-to-end solution for sending notifications as email or text messages for the events and jobs happening in your Aurora PostgreSQL database. You can also implement this solution for auditing, monitoring, or scheduling database batch jobs, and can customize it based on your needs. You can apply this solution to RDS and Aurora PostgreSQL databases.
If you have comments or questions about this solution, please submit them in the comments section.
About the Authors

Rajeshkumar Sabankar is a Database Specialty Architect with Amazon Web Services. He works with internal Amazon customers to build secure, scalable and resilient architectures in AWS cloud and help customers perform migrations from on-premise databases to AWS RDS and Aurora Databases.

Santhosh Kumar Adapa is a Oracle Database Cloud Architect at Amazon Web Services. He works with internal Amazon customers to build secure, scalable and resilient architectures in AWS cloud and help customers perform migrations from on-premise databases to AWS RDS and Aurora Databases.